
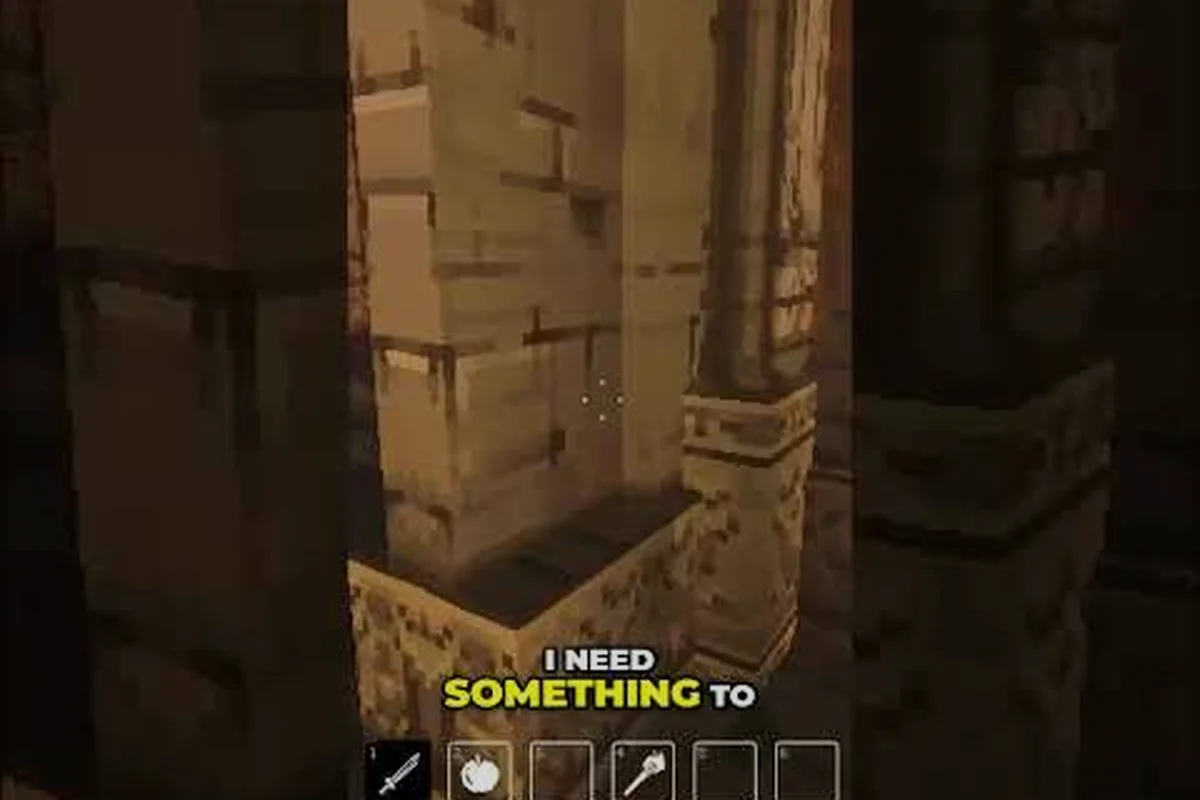
Choosing the right first craft in Deep Dish Dungeon decides whether your first ten runs feel like a grind or a steady power climb. Every new clerk faces the same wall of ingredient icons, recipe tabs, and tier colors, and spending scarce mats on the wrong recipe can stall a run before the second floor. This guide lays out the crafting priority that experienced players use, the resource farming spots that feed it, and the upgrade path that keeps a fresh character alive long enough to see late-game drops. Get the order right and the dungeon stops punishing you for showing up unprepared.
Why Your First Craft Matters in Deep Dish Dungeon
The crafting system in Deep Dish Dungeon is built around a tight resource economy. Every floor only drops a handful of usable mats, and recipes compete for the same pool of cloth, ore, bone, and slime residues. When a player burns those mats on a flashy weapon recipe that does not match their class, they leave the run with a half-finished upgrade chain and a dead character. Getting the crafting priority right at the start of a run is the single biggest lever for survival, because each crafted piece feeds into the next tier of the same branch.
Players who skip the first craft entirely end up relying on floor drops, which according to community data average about 30 percent weaker than a properly crafted equivalent. The dungeon does not punish you for crafting the wrong piece by removing your mats — it punishes you by giving the next floor a damage value your current weapon cannot match. That is why the answer to what to craft first is almost always a defensive or class-synergistic piece, not the highest-damage icon in the recipe list.
The Three Pillars of Early Crafting
Every strong first craft in Deep Dish Dungeon sits on one of three pillars. The first pillar is Survival Gear — a piece that directly extends your run by reducing incoming damage, healing over time, or granting a defensive proc. The second pillar is Class Synergy — a weapon or accessory that amplifies the core mechanic of the chosen class, whether that is a caster's mana pool, a rogue's crit window, or a brute's enrage timer. The third pillar is Economy — a piece that refunds mats, boosts drop rates, or converts trash loot into useful resources.
Most new clerks reach for the damage pillar because the numbers look the biggest, but community testing shows the survival pillar delivers more value per mat in the first five floors. A single piece of Baked Plate or Stale Crust Armor can absorb two extra hits per floor, which compounds across an entire run. The class synergy pillar matters most once you know which class you intend to push to the late floors, and the economy pillar is best saved for runs where you already have a stable build.
| Pillar | Example First Craft | Mat Cost (Low Floor) | Expected Lifespan | Best For |
|---|---|---|---|---|
| Survival Gear | Baked Plate | 8 Ore, 4 Cloth | Floors 1–6 | Every class |
| Class Synergy | Ember Wand | 6 Ore, 6 Slime | Floors 1–5 | Caster builds |
| Class Synergy | Rusty Greataxe | 10 Ore, 2 Bone | Floors 2–6 | Brute builds |
| Economy | Salvager's Kit | 5 Cloth, 3 Bone | Floors 1–8 | Farming runs |
| Damage | Frost Shiv | 4 Ore, 2 Slime | Floors 1–3 | Speed runs only |
The table makes the trade-off visible at a glance. Damage pieces burn mats for a window of two to three floors, while survival and economy pieces pay back their cost across six or more. For a fresh run with no class locked in, the survival pillar is the safest answer to the question of what to craft first.
When to Break the Priority
The priority above is a default, not a rule. If the dungeon hands you a class-specific mat drop on floor one, the equation shifts, and ignoring that drop means wasting a rare resource. The crafting system in Deep Dish Dungeon occasionally offers Resonance Events, short windows where a single recipe costs half its normal mat price. During those windows, higher-tier crafts become reachable, and the priority list bends.
Another break point is the Bounty Board floor, which appears roughly once every ten runs. The board offers a guaranteed recipe fragment for completing a side objective, and crafting that fragment immediately often unlocks a class-defining piece. Players who ignore the bounty and stick to the default priority lose the fragment, so the rule of thumb is to let the dungeon tell you when the priority changes. For a full walkthrough of how floor events reshape your run plan, the Deep Dish Dungeon progression guide breaks down the first ten floors in detail.
The Core Crafting Materials and Where to Farm Them
The crafting economy of Deep Dish Dungeon runs on five core mats: Ore, Cloth, Bone, Slime Residue, and Ember Shards. Each mat drops from a specific enemy family, and learning the route that hits every family on a single floor is the fastest way to fill your bag. Most floors feature at least three mat families, and a player who clears the floor methodically ends the run with enough materials for one full craft plus leftovers for the next.
The five mats serve different recipes. Ore is the backbone of weapon and armor recipes because it appears in roughly 70 percent of all crafts. Cloth is the secondary mat for armor, accessories, and most consumables, and it is also the mat that players most often run out of. Bone drops from undead-type enemies and feeds blunt weapons, shields, and a handful of economy accessories. Slime Residue is the caster mat, and Ember Shards are the rarest drop, reserved for the highest tier of recipes. Understanding which mat you need tells you which floor path to take.
Floor-by-Floor Farming Routes
Different floors in Deep Dish Dungeon favor different mat families. The early floors (1–4) are heavy on Cloth and Slime, with light Ore spawns. The mid floors (5–8) balance all five mats and introduce the first Ember Shard drops. The late floors (9+) shift toward Bone and Ember, with Cloth and Slime becoming rare. The table below shows the recommended farming target per floor band, based on community-reported drop rates.
| Floor Band | Best Mat to Farm | Enemy Family to Hunt | Avg Mats per Clear | Notes |
|---|---|---|---|---|
| Floors 1–4 | Cloth | Sewer Crawlers, Ragged Husks | 12–18 Cloth | Avoid boss room until ready |
| Floors 1–4 | Slime Residue | Oozing Pots, Acid Sprites | 8–12 Slime | Use AoE to multi-tag pots |
| Floors 5–8 | Ore | Crag Imps, Ironbound Beetles | 15–22 Ore | Mineable nodes also spawn |
| Floors 5–8 | Bone | Skeletal Sentinels, Risen Clerics | 10–16 Bone | Undead rooms are common |
| Floors 9+ | Ember Shards | Ash Elementals, Cinder Wraiths | 2–5 Ember | Save for tier-3 crafts only |
The drop numbers above are community-reported averages and may vary by patch. The key insight is that floors 1–4 should be treated as a Cloth and Slime farming phase, while floors 5–8 are the Ore and Bone phase. A player who tries to force Ore farming on floor 1 will spend 20 minutes clearing mobs that do not drop it, while a player who pivots to Cloth on floor 1 will finish the same clear with a full bag.
For a deeper look at every material in the game and how they combine into late-game recipes, the Deep Dish Dungeon materials list catalogs every mat by floor, drop source, and recipe use. Pairing that reference with the route table above lets a new player plan a full run around a single target craft.
When to Stop Farming and Start Crafting
A common mistake new players make is treating the crafting system as an endless farming loop. The dungeon expects a player to commit to a craft at the end of floor 4 or the start of floor 5, because that is when recipe unlocks stabilize and mats are still abundant. Holding mats past floor 6 risks losing them to a bad boss pull, since death drops roughly half of unspent materials.
The cleanest signal to stop farming is when your bag holds enough mats for your target craft plus two full backup crafts. At that point, every additional mat is diminishing returns, and the time spent farming is better spent learning the boss patterns on the next floor. The dungeon rewards commitment, not hoarding, and the first craft should always happen before floor 7, even if the recipe is not the one you originally planned.
Upgrade Priorities After Your First Craft
Crafting the first piece is only half the answer to what to craft first in Deep Dish Dungeon. The other half is knowing how to upgrade it, because every recipe has a three-tier upgrade path and skipping a tier wastes the investment. The upgrade system in Deep Dish Dungeon is linear: a tier-1 craft can be upgraded to tier-2 with a single mat infusion at any crafting bench, and tier-2 to tier-3 requires both the mat infusion and a Resonance Core drop from a mid-boss.
The crafting priority list shifts once an item is on the upgrade track. A tier-1 Baked Plate costs 8 Ore and 4 Cloth, but upgrading it to tier-2 costs another 6 Ore and 4 Cloth, and tier-3 adds 8 Ore, 6 Cloth, and 1 Resonance Core. The total mat investment across the full upgrade chain is therefore 22 Ore and 14 Cloth for a single armor piece, which is a heavy ask on a fresh run. That is why experienced players only commit to a full upgrade chain on pieces that will survive at least four floors after the upgrade.
Tier-by-Tier Upgrade Costs
The upgrade costs vary by recipe family, but the pattern is consistent. Weapons and armor scale their mat cost in line with their tier number, while accessories and consumables follow a flatter curve. The table below shows the full mat cost for upgrading a selection of common first crafts to tier-3, using community-collected numbers from the crafting bench interface.
| Recipe | Tier-1 Cost | Tier-2 Cost | Tier-3 Cost | Total Mat Investment | Floors of Value |
|---|---|---|---|---|---|
| Baked Plate | 8 Ore, 4 Cloth | 6 Ore, 4 Cloth | 8 Ore, 6 Cloth, 1 Core | 22 Ore, 14 Cloth, 1 Core | 5 floors |
| Ember Wand | 6 Ore, 6 Slime | 6 Ore, 6 Slime | 8 Ore, 8 Slime, 1 Core | 20 Ore, 20 Slime, 1 Core | 6 floors |
| Rusty Greataxe | 10 Ore, 2 Bone | 8 Ore, 2 Bone | 10 Ore, 4 Bone, 1 Core | 28 Ore, 8 Bone, 1 Core | 5 floors |
| Salvager's Kit | 5 Cloth, 3 Bone | 4 Cloth, 3 Bone | 6 Cloth, 4 Bone, 1 Core | 15 Cloth, 10 Bone, 1 Core | 8 floors |
| Frost Shiv | 4 Ore, 2 Slime | 4 Ore, 2 Slime | 6 Ore, 4 Slime, 1 Core | 14 Ore, 8 Slime, 1 Core | 3 floors |
The "Floors of Value" column is the real metric for upgrade priority. A piece that lasts three floors after the final upgrade is a worse investment than a piece that lasts eight floors, even if the upfront cost is lower. That is why the Salvager's Kit is the strongest long-term craft despite its modest damage contribution, and why the Frost Shiv is reserved for speed runs where the player plans to finish the dungeon in under ten floors.
When to Skip the Tier-3 Upgrade
Not every craft deserves a full upgrade chain. The Resonance Core is a contested drop, and spending it on the wrong piece can lock a run out of its strongest late-game crafts. According to community data, the average run sees about 1.4 Resonance Cores drop per clearing of floors 5–10, which means a player can afford exactly one tier-3 upgrade per run. Choosing that one upgrade is the most important crafting decision in the entire run.
The general rule is to spend the Resonance Core on the piece that defines your class identity. For a caster, that is the Ember Wand or its tier-3 evolution. For a brute, it is the Rusty Greataxe path. For a hybrid build that mixes defense and damage, the Baked Plate is usually the right call because the tier-3 upgrade adds a damage-reflect proc that turns the armor into a weapon in long fights. For a deeper look at how gear choices interact with the broader leveling path, the Deep Dish Dungeon upgrade priority guide maps upgrade chains to class builds across the full game.
Resource Farming Tactics for Harder Materials
The default mat routes work fine for the first few floors, but the late game introduces two mats that do not drop from normal mobs: Ember Shards and Resonance Cores. Both are gated behind specific floor mechanics, and learning those mechanics is the difference between a smooth run and a stalled one. The crafting system in Deep Dish Dungeon treats these mats as currency, and the dungeon expects players to make trade-offs between spending them on gear and banking them for a future recipe.
Ember Shards drop from Ash Elementals on floors 9 and 10, and from the Cinder Wraith mini-boss that spawns once per late-game floor. The drop rate is low, averaging 2 to 5 shards per clear, and the elemental enemies hit hard enough that a poorly geared player cannot farm them safely. The optimal approach is to clear the floor up to the Ash Elemental room, kill the wraith if present, and then retreat to a crafting bench before pushing deeper. This gives the player a guaranteed Ember source without committing to a full late-game clear.
Trading Mats for Progress
The crafting bench also supports a mat-trade interface, unlocked after the first successful tier-2 upgrade. Players can convert four of any common mat into one of any other common mat, at a fixed ratio. This system is the safety net that makes the crafting priority list flexible, because a player who finds themselves with too much Ore and not enough Cloth can convert before committing to a recipe.
The trade ratios below are taken from the in-game bench interface, and they have not changed since launch according to community testing. The trade is one-way, so converting Cloth into Ore locks the player out of any recipe that needs that Cloth for the rest of the run.
| Source Mat | Target Mat | Conversion Ratio | Daily Cap | Notes |
|---|---|---|---|---|
| Ore | Cloth | 4 Ore → 1 Cloth | 12 conversions | Cap resets per run |
| Cloth | Ore | 4 Cloth → 1 Ore | 12 conversions | Same as above |
| Bone | Slime | 4 Bone → 1 Slime | 8 conversions | Undead-heavy runs benefit |
| Slime | Bone | 4 Slime → 1 Bone | 8 conversions | Caster-heavy runs benefit |
| Ember | Core Fragment | 5 Ember → 1 Fragment | 4 conversions | Combine 3 Fragments for 1 Core |
The Ember-to-Fragment trade is the only way to guarantee a Resonance Core without depending on a mini-boss drop. Five Ember Shards convert to one Core Fragment, and three Fragments combine at a tier-3 crafting bench into a full Core. That means a player who farms Ember deliberately across floors 9 and 10 can guarantee one tier-3 upgrade per run, regardless of mini-boss RNG. The trade is harsh on the resource budget, which is why most players reserve it for runs where the mini-boss has already been missed.
For a complete catalog of every item you can craft, trade, or buy in the game, the Deep Dish Dungeon ingredient items reference lists every recipe ingredient, its drop source, and the recipes that consume it. Pairing that reference with the farming routes above gives a new player everything needed to plan a full run around a single high-value craft.
Putting the Priority List Into Practice
The full answer to what to craft first in Deep Dish Dungeon comes down to a three-step routine that experienced players run every time. Step one is to read the floor-one recipe drops and identify which class mats the dungeon is offering. Step two is to commit to either the survival pillar or the class synergy pillar based on that drop pattern, and to start farming the corresponding mat route immediately. Step three is to craft the chosen piece before floor 7 and to plan the Resonance Core spend before floor 9.
The routine sounds simple, but it requires the player to ignore the temptation of high-damage crafts that do not match their class. The crafting system in Deep Dish Dungeon rewards specialization, and a tier-2 Baked Plate on a focused build will outperform a tier-3 Frost Shiv on a scattered one. The dungeon also rewards mat discipline, which means a player who converts mats at the bench should always check the trade ratios first to avoid losing a flexible mat for a rigid one.
Quick Reference Priority Order
For players who want a one-screen summary of the crafting priority, the table below condenses the full guide into a tiered list. Each row is a craft category, the recommended mat floor to farm it on, and the upgrade target for the Resonance Core spend.
| Priority | Craft Category | Farm On | First Floor to Use | Core Spend Target |
|---|---|---|---|---|
| 1 | Survival Gear (Baked Plate) | Floors 1–4 | Floor 5 | Tier-3 Baked Plate |
| 2 | Class Synergy (Ember Wand) | Floors 1–4 | Floor 4 | Tier-3 Ember Wand |
| 3 | Class Synergy (Rusty Greataxe) | Floors 5–8 | Floor 6 | Tier-3 Greataxe |
| 4 | Economy (Salvager's Kit) | Floors 1–4 | Floor 3 | Tier-3 Kit |
| 5 | Damage (Frost Shiv) | Floors 1–3 | Floor 2 | Skip Core entirely |
| 6 | Late Consumables | Floors 9+ | Floor 9 | None — mats only |
This table is a default, not a law, and the best players adjust it based on what the dungeon hands them. A run that opens with a class-specific mat drop on floor one can jump straight to priority 2, and a run that never sees the Bounty Board can safely skip priority 4. The dungeon is generous with mats but strict on time, so the priority list is a tool for fast decisions, not a script to follow blindly.
The full gear upgrade guide loop in Deep Dish Dungeon is therefore: pick a pillar, farm the matching mat route, craft the matching recipe before floor 7, upgrade it through the tier chain, and spend the single Resonance Core on the piece that defines your build. Every other crafting decision in the run flows from those five steps, and every strong run in the game follows that template. Players who internalize the loop stop asking what to craft first and start reading the dungeon to find out.
Frequently Asked Questions
What is the single best first craft for a brand new player in Deep Dish Dungeon?
The Baked Plate is the safest first craft for a new player because it costs common mats (Ore and Cloth) and extends run length across the first six floors. Its tier-2 upgrade also adds a small heal-on-hit proc that helps new players learn the timing of dungeon combat without one-shot deaths.
How do I decide between the survival and class synergy pillars?
Pick survival if you do not yet know which class you want to push to the late floors, and pick class synergy if you have already committed to a caster, brute, or rogue build. The survival pillar is the right default for a fresh save, and the class synergy pillar becomes the right answer after the first or second successful run.
Where is the best place to farm Resonance Cores if I miss the mini-boss?
The mat-trade interface at any tier-3 crafting bench accepts five Ember Shards in exchange for one Core Fragment, and three Fragments combine into a full Core. The most reliable farm is to clear floors 9 and 10 for Ember Shards, then trade up at the bench before the final boss pull.
Should I ever skip crafting entirely on a run?
Yes, on speed runs where the player plans to clear the dungeon in under ten floors and never engage the tier-3 upgrade system. Skipping crafting frees up time for a faster clear, but it also removes the safety net of the Salvager's Kit economy pillar, so the trade-off only works for experienced players who can clear the early floors without defensive gear.
How does the crafting priority change after I unlock the camp system?
The camp introduces a parallel upgrade path that competes with the dungeon crafting bench for the same Resonance Core. Once camp upgrades are unlocked, most players split their Core spending between one tier-3 gear piece and one camp upgrade, which lowers the dungeon crafting ceiling by one tier but stabilizes the long-term resource loop.